Docker, Moby and Linuxkit - A Windows Setup Tutorial
Installing Moby project and linuxkit on Windows – DEVELOPER MACHINE
Pre-Required:
Windows10 Pro with Hyper-V and 60min of your time.
Today, I tried or better I installed the components are necessary to run Docker’s Moby Project and linuxkit on Windows.
Before we can start building an image we should check a couple of pre-requirements first. I will also describe how to use Git Bash or PowerShell to fire commands and stuff like that. So keep reading :)

Before you can start …
Before we can start you need to make sure your system environment is ready to go. We will need a couple of additional programs / tools to work with this tutorial.
- An Text-Editor (Notepad, Notepad++, Microsoft Code, what ever :) )
-
And cmd or bash window. You can use the default Microsoft cmd or better a powershell session for running the commands. I will use GitBash in this tutorial.
Cygwin will also be okay. But it’s quite a huge think to install but If you have it and like it -> use it! - The “make”-Tool for Windows. I love the lightweight MinGW-Toolset. You can download it here:
Download form sourceforge
Projekt Website
After the installation I did to additonal steps.
- Add the path of the MinGW to my system path.
- Rename the WinMake.exe into make.exe
No we have a basic setup to start with this tutorial.
Step 1: Do you have Docker for Windows installed?
If you have Docker for windows already installed you can go to step 2 now.
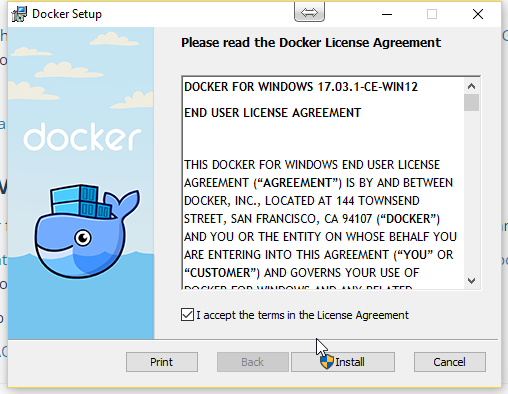
If not: Let’s install Docker for Windows first. The installation process is quite strait forward.
WARNING: Your Compute will reboot 2 – 3 times! Save everything before starting the installation.
-
Download the latest Windows Installer from the Docker store. Download Docker for Windows and launch the installer.
-
Click on Install
If your Hyper-V Feature is not enabled, yet – Don’t worry. Docker will check that first before starts operating.
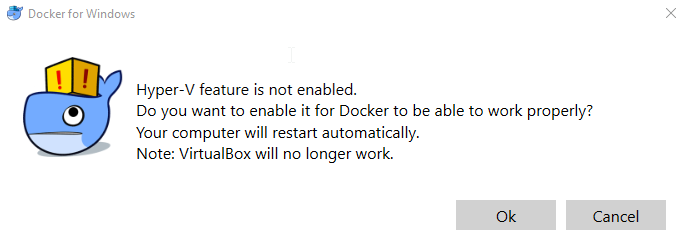
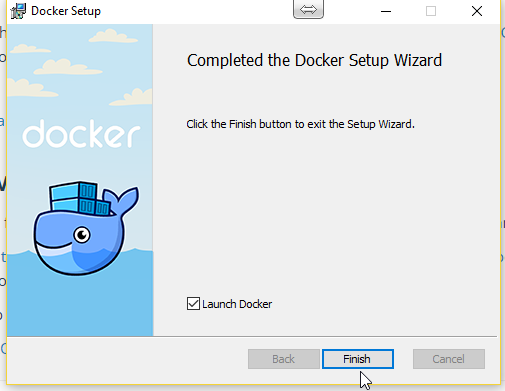
Simply click “OK” to install the Feature. Your Computer will restart 2-3 times.
After the reboots, you can find the docker whale in your status-bar. You can check the status by right clicking the icon -> Settings.
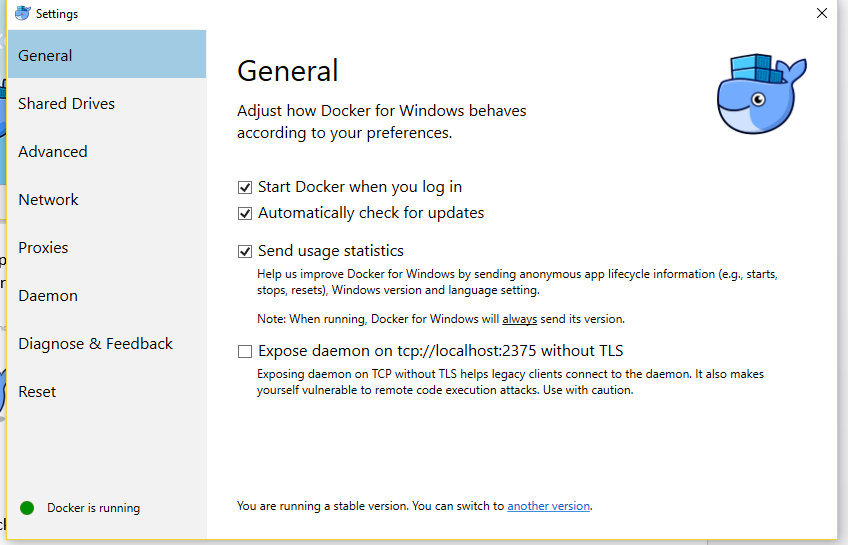
Congratulations – Docker is now up and running and we can start with the Golang installation.
Step 2: Do you have Golang installed?
If so, go directly to Step 3.
You can find the Windows-Installer here: Golang Windows Installer
After installing you can check the go.exe is part of your global system path variable.
Just type go env in your command line tool (I will use Git Bash in my example).
Your output should look like this:
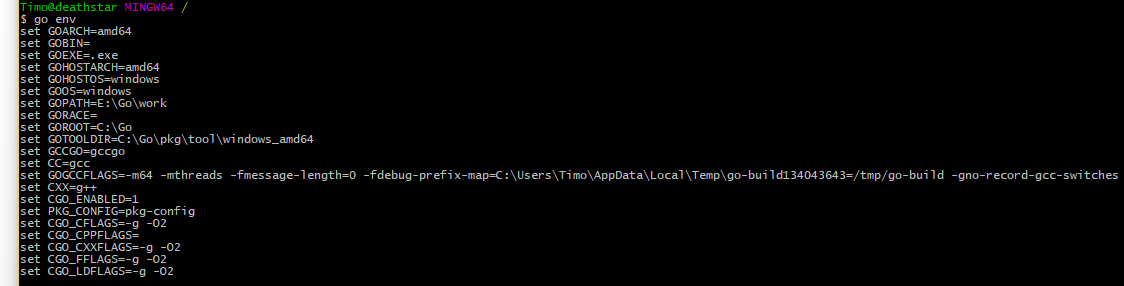
Per default your GOPATH is not set globally. Have a look here how to set you GOPATH for windows globally.
Setting you Go Path
After this step your GOPATH should be there globally. Now we are ready to download and build our moby and linuxkit binaries for windows.
For a better usage later on I added the $GOPATH/work/bin/ to my global system path as well.
Step 3. Dowload and install linuxkit and moby for Windows
There are several ways to install moby and linuxkit. Just have a look into the Github-Repo. Linuxkit @ Github
You can download or clone the github repo and run make to build the binaries. Let’s have a look on that option.
Create a directory somewhere on your drive and clone the linuxkit github repo into it.
git clone https://github.com/linuxkit/linuxkit.gitNow, we can start making the binaries.
On my machine the make process failed. Running make on the Makefile from the linuxkit I received the following error.
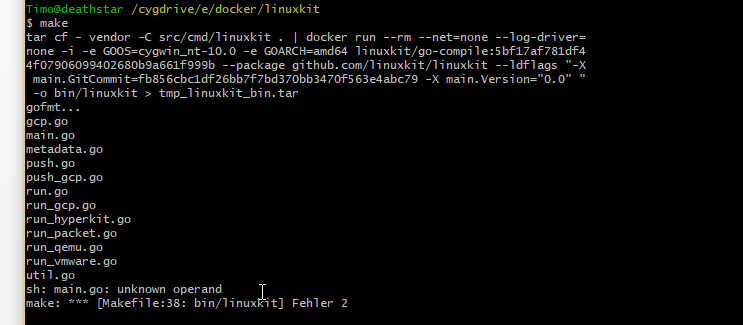
I will work on that error later and check whats wrong here. Update: #1863 opened. The Makefile is using an incorrect GOOS value.
For me and now I decided to use the “go-way” building the binaries. Let’s rock.
You can run the commands show in the linuxkit github repo.
go get -u github.com/moby/tool/cmd/moby
get -u github.com/linuxkit/linuxkit/src/cmd/linuxkit
These commands are just downloading the files! They are NOT complied now. So, let’s do it.
But wait?! Where are my sources? We did not specified any download path? Is it just magic? Now, not really. Have a look into to your Go envs. Navigate inside your GOPATH. Here they are. Go to
src/github.com/
Here you can see at least to folders. Moby and linuxkit. To build the binaries you can run the make command inside the moby or linuxkit directory (Lets keep it simple. The make command need a makefile. So let the make run where the Makefile is stored).
The make command will output and golint error at the first run.
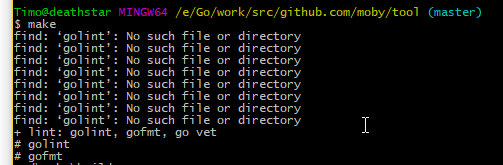
To fix this just download the golint form github with our old fried go –get.
For more information, visit the github repo: Golang @ GitHub
go get -u github.com/golang/lint/golintNow you can run the make command inside the moby directory again. You should have a moby.exe file in $GOPATH/work/bin/ now.

Congratulations! Moby and linuxkit are now working on your machine. Don’t trust me! I am a developer ;) Better check it yourself.
Note: You sould close your active cmd / bash window after adding your go-pathes to your global system variables.
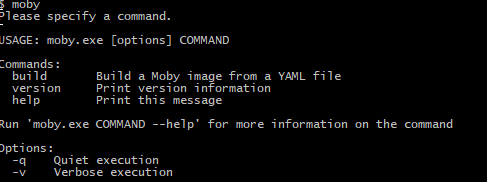
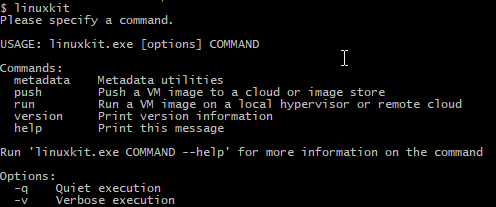
After this type moby and linuxkit after each other.
Moby shows:
Linuxkit shows:
Step 4: Build an image with Moby.
Just to make it simple, we use an example.yml file for our teste. You can find the examples in the cloned GitHub repo of linuxkit. Go into the examples directory and copy the yml-file into a new created test directory.
So, now the “For Windows users only” things coming into the game!
The linuxkit / mobyproject for Windows is not integrated in the tools yet. That means you are not able to to start your image with linuxkit run. There is a Powershell Script to close that gap and launch your moby builded images.
Let’s start with building an iso to boot our HyperV-VM before we are looking into the powershell script.
I copied the docker.yml linuxkit example file into a new directory. For a better understanding you should read the file and understand it. There is one line very important for us.
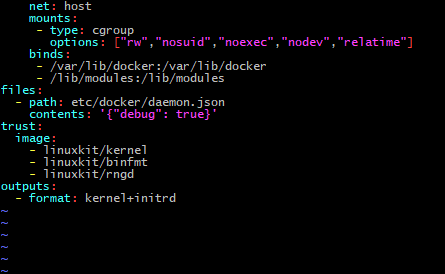
To make the iso runnable or adoptable for HyperV we need to change the output format:
From kernel+initrd to iso-efi.
For more information see the docs @ github:
https://github.com/linuxkit/linuxkit/blob/master/docs/yaml.md
Now, we can start building our first moby-Image. Inside your docker example directory run
moby build docker (Or the name of your yml-file). Your output should look like this:

Congratulations, there is your first docker-efi.iso. Ready to create a HyperV-VM out from it.
Step 5. Start your moby-image in HyperV
As mentioned above, you can’t start your VM by typing linuxkit run. This is not supported, at the moment. Because of that you can find a script to create a HyperV-VM from the created iso-file.
You can find the script in the linuxkit/scripts folder.
It looks we need to create the VM first and can run it with LinuxKit.ps1 –Start. So, let’s create the VM.
For this, I am using a Powershell-Session and run the LinuxKit.ps1 Script with the minimal set of inbound parameters.
-IsoFile = Path to the moby created ISO-file
-Create = To create the machine

Your output should look like this.

Now, you can see the created VM in your HyperV Manager. Let’s check it out.
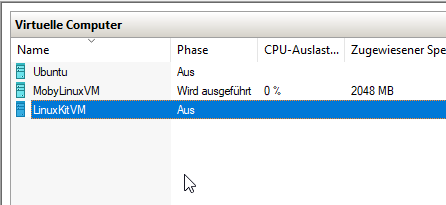
Here they are. Let’s start the VM. We will use the script again and type
LinuxKit.ps1 –Start.Let’s check the HyperV Manager again.
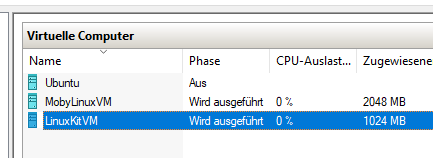
The moby builded VM is no up and running!